Set your Home Page

You now need to create and select your Home Page for your Canvas site. If you do not have any Pages, create a new Page and define it as the Home Page.

  • Select the Pages button on the left navigation.
  • If you have a list of Pages, you can now select your Home page.
  • Publish the Home Page.
  • Find the Gear icon for that page.
  • Click on Set Home Page.
  • Go to the Home button so you will now be on the landing page of your course site.
  • On the right navigation click on Choose Home Page.

Draft State

In Draft State, items in Assignments, Quizzes, Modules, Pages, and Discussions are unpublished by default, that means students cannot see these items until they are published. AND, graded items like assignments and quizzes are not included in gradebook and are not calculated.

Changes to the Canvas interface include:

  • Pages has an Index page and displays page titles.
  • Individual pages do not include sidebars.
  • Any page can be set as the front page of their course.
  • Quizzes do not have to be republished if the content is changed.
  • If a Module is not published all content within that module is hidden.

How do I use Draft State in Pages?
How do I use Draft State in Modules?
How do I use Draft State in Quizzes?
How do I use Draft State in Assignments?
How do I use Draft State in Discussions?

View the video overview of Draft State

Checking student progress in Modules

Within Modules, you can view the progress of your students and see how they are progressing through the course. Module progress is determined by the students completing required elements in the module.

  1. Under Modules, click on the View Progress button
  2. Module Progress by Student window shows the progress of each student in your course.

Checking student progress in Modules

Fonts, sizes and color settings in Outlook

Settings at Windows level

By modifying the settings at Windows level, you change all the settings for all the applications.

  • Right click on an empty space on your Desktop and choose “Screen Resolution”.
  • Select “Make text and other items larger or smaller”.
  • Choose from Smaller(Default) Medium(125%) or Larger(150%)
  • Use the Adjust Clear Type text selection to turn on Clear Type to improve readability of text on LCD screens.

Settings at Outlook level

Outlook/Office 2013 comes with the themes White, Light Gray and Dark Gray. To change your Office theme: In Outlook 2013 select File tab, Office Account and select an Office Theme and Background

Mailbox font type and size

Use the View Tab, View Settings button in Outlook to change the font type, size and color. Settings can be different for each folder or the same for all:  In Outlook 2013
select View Tab, View Settings button, Conditional Formatting button

Calendar font type and size

To change the font type that is used in your Calendar: select the Calendar, select the View Tab, View Settings button, Other Settings button.

Calendar items background color

In the Calendar View, select the View Tab, click on the Color button to choose a color,

Writing emails

The default font settings for new emails, replies and forwards can be found in:  File Tab, Options, Mail section,  Stationery and Fonts button.

Calendars

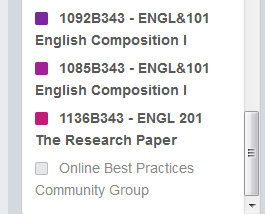
When viewing your Calendar, Select your current quarter course calendars.

Calendar-1 

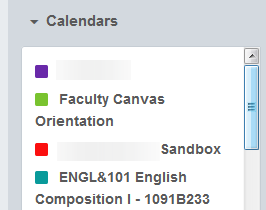
Deselect your personal and sandbox calendar.

  Calendar-2                   

Your Calendar view will show a maximum of 10 course calendars.